Utilizing Wait Time in Limo Anywhere
Whether you're dealing with delays around town, picking up after domestic flights, or managing international arrivals, adding wait times ensures fair compensation for both you and your chauffeur. This blog covers setting your wait time rates, establishing grace periods, and how chauffeurs can start and end wait times in Driver Anywhere.
Configuring Wait Time and Grace Periods
- Click “My Office” in the Navigation Bar.
- Navigate to the “Company Settings” Tab.
- Select “Company Preferences” from the left-hand menu.
- Click “DriverAnywhere.”
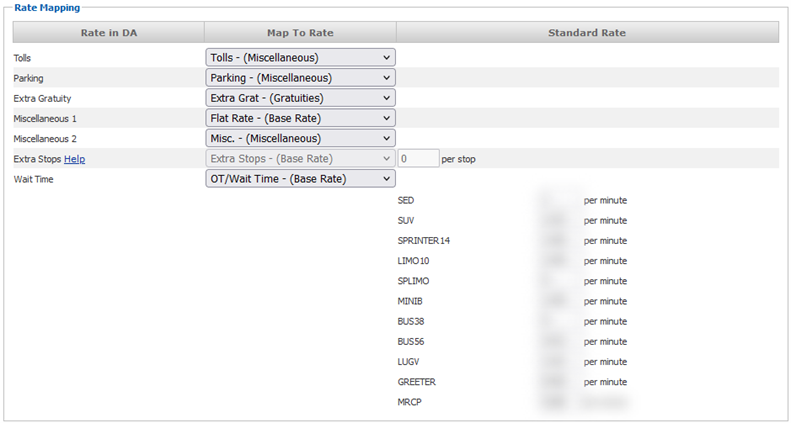
- Select the appropriate rate from the “Map to Rate” section.
- Set the per minute rate for each Vehicle Type that you intend to charge Wait Time for.
7. Set the grace period for your different transfers (non-airport transfers, domestic arrivals, and international arrivals).

8. Scroll to the bottom of the page and select “Update my Company Preferences” to save changes.
Initiating Wait Time in Driver Anywhere
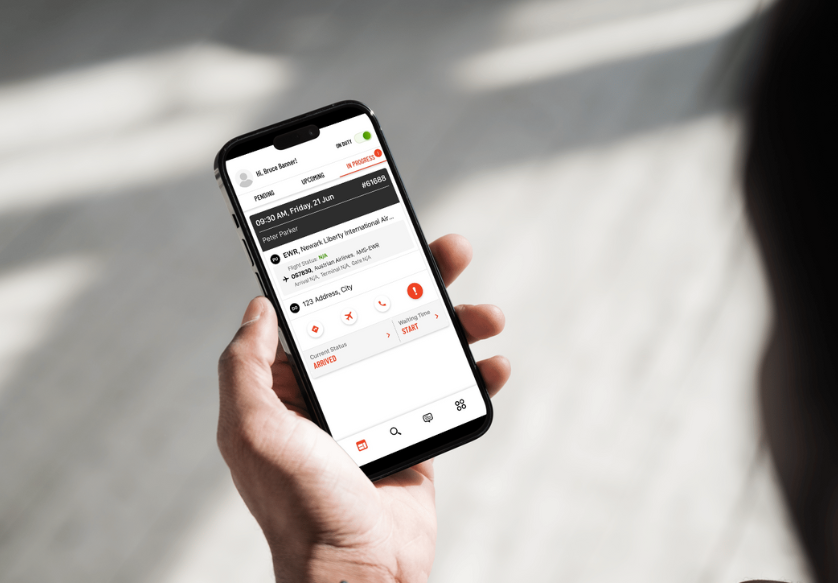
- Once a driver has updated their status to “Arrived” in Driver Anywhere (or to any status that is mapped to the “Driver is Waiting at Pickup” section of the Driver Flow), an option will appear that allows them to initiate Wait Time. For more information about the Status Mapping in your system, check out our recent blog on the topic: Utilizing Custom Statuses In Limo Anywhere.

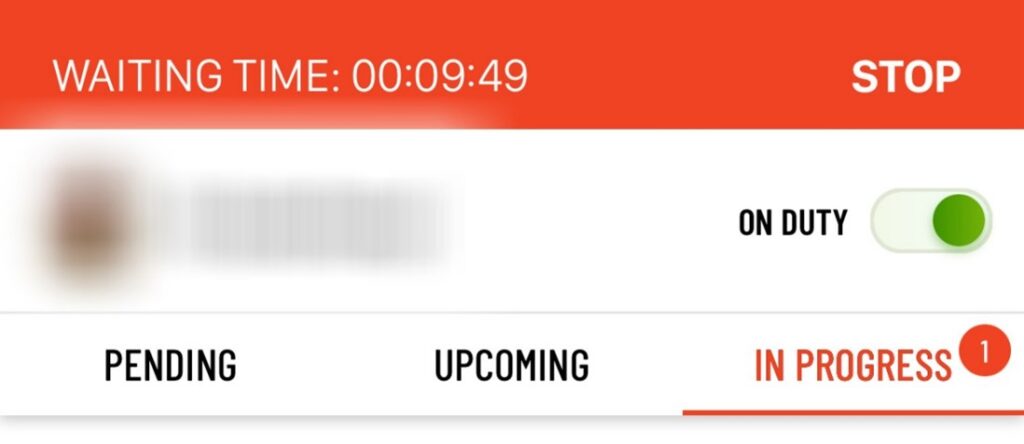
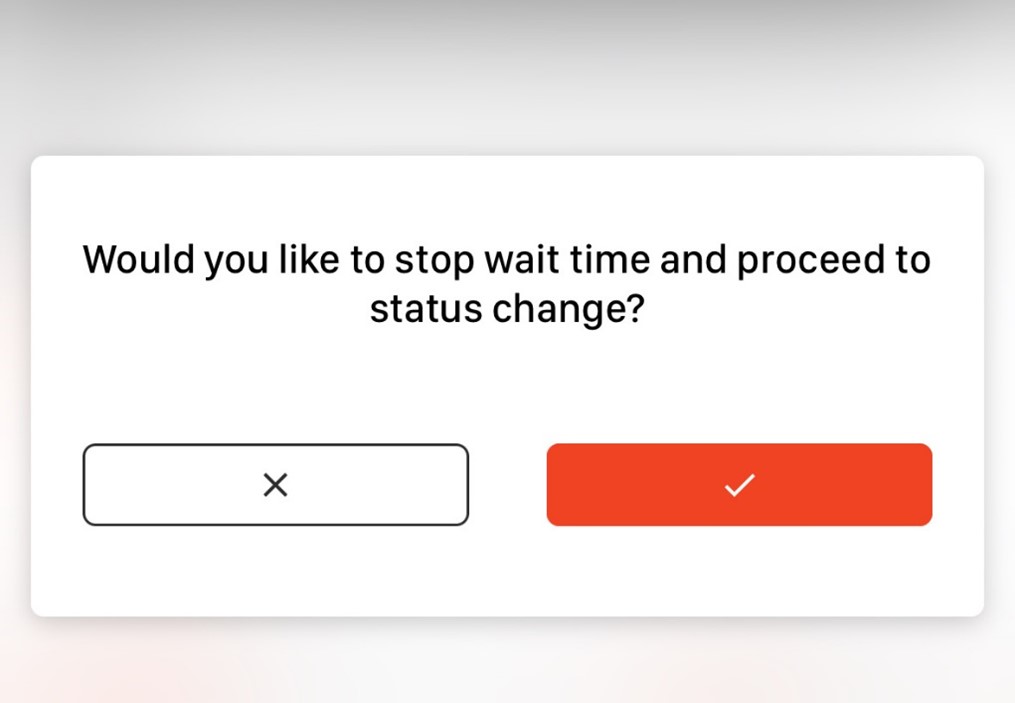
2. Once Wait Time has started, drivers can either stop Wait Time by selecting “STOP” at the top of the app screen or by changing their status to the next workflow phase.
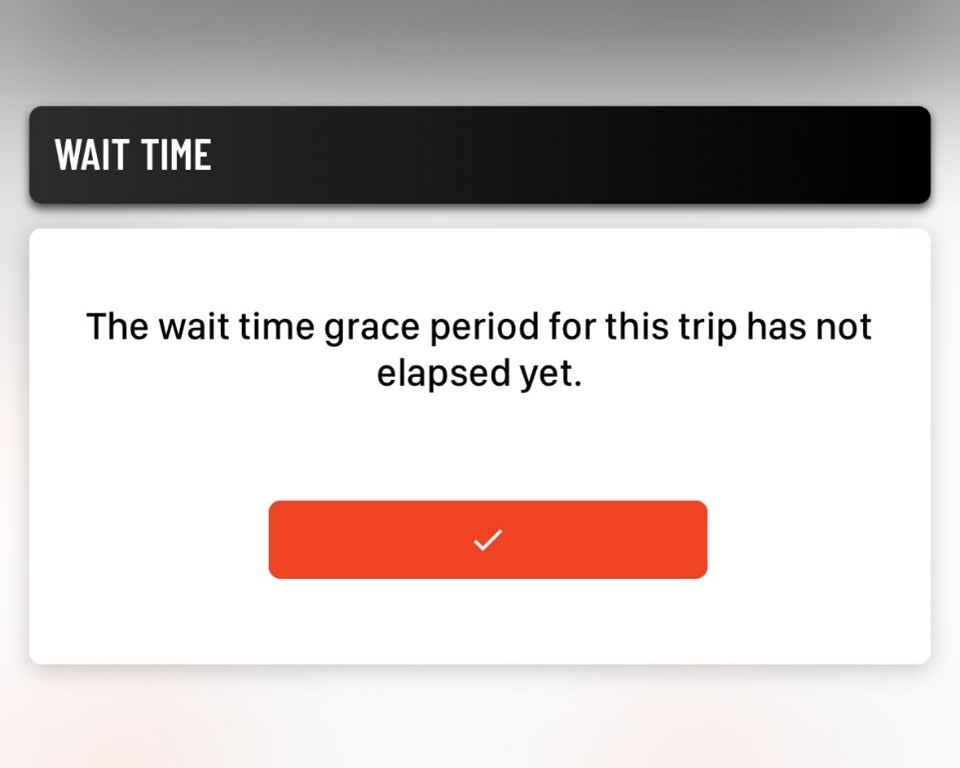
3. Note: If a driver attempts to initiate Wait Time within the allotted grace period, they will be notified and will be unable to start wait time until the appropriate amount of time has elapsed.
If you have any questions or need help, please don't hesitate to reach out to our support team for assistance. Have a suggestion for us? Send an email to ProductTeam@LimoAnywhere.com; your input is important for our continued success.
Recent Posts

Limo Anywhere Stands with Our Industry – Supporting the Chauffeurs Who Drive Us Forward
Friday April 18, 2025
Turn Weekend Rides Into Repeat Business: How to Use Promo Codes to Grow Your Leisure Bookings
Wednesday April 16, 2025