Minimize Disruptions with Automatic Reservation Manifests

In a perfect world, we’d never experience power outages, internet disruptions, or software downtime. But in the real world, things don’t always go according to plan. While we can’t eliminate every potential hiccup, there are steps you can take to ensure your operation continues smoothly, even in an imperfect world. In this blog, we’ll take an in-depth look at how you can both manually generate and schedule your email reservation manifests, ensuring you have access to critical business information when the unexpected happens.
Manually Generate a Reservation Manifest
1. Click the Reports icon in the navigation bar.
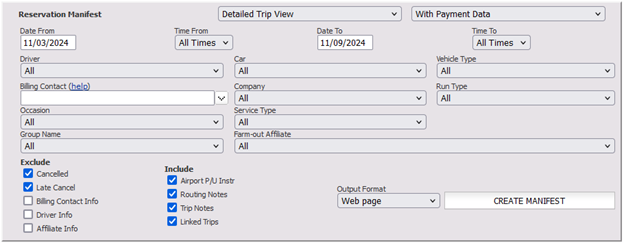
2. Navigate to the Reservation Manifest report module (second option from the top in the right-hand column).

3. Choose your preferred View from the dropdown menu:
a. Detailed View: This option displays additional information, including trip notes and details for any linked trips.
b. Summary View: A more concise version with essential trip details.
4. Select whether you’d like the report to include Payment Data by selecting the appropriate option from the dropdown menu.
5. Choose the Date Range for the manifest (e.g., Today, +1 day, +2 days).
6. (Optional) Narrow the window of time with Time From and Time To.
7. You can further filter the manifest by Driver, Car, Vehicle Type, Billing Contact, and more.
8. Under the Include section, choose additional information you'd like to see, such as Airport Pickup Instructions, Routing Notes, or Linked Trips.
9. Select your Output Format:
Web Page
Send Email
Excel-Standard
Excel-Inline
10. Click the Generate Report button to create the manifest in your request format. Once created, it will be available for you to download, view, or email.
Setting Up Automatic Email Reservation Manifests
For regular access to your reservation manifest without the need to generate it manually each time, you can schedule automatic email delivery. Here’s how to set it up:
1. Click the My Office in the navigation bar.
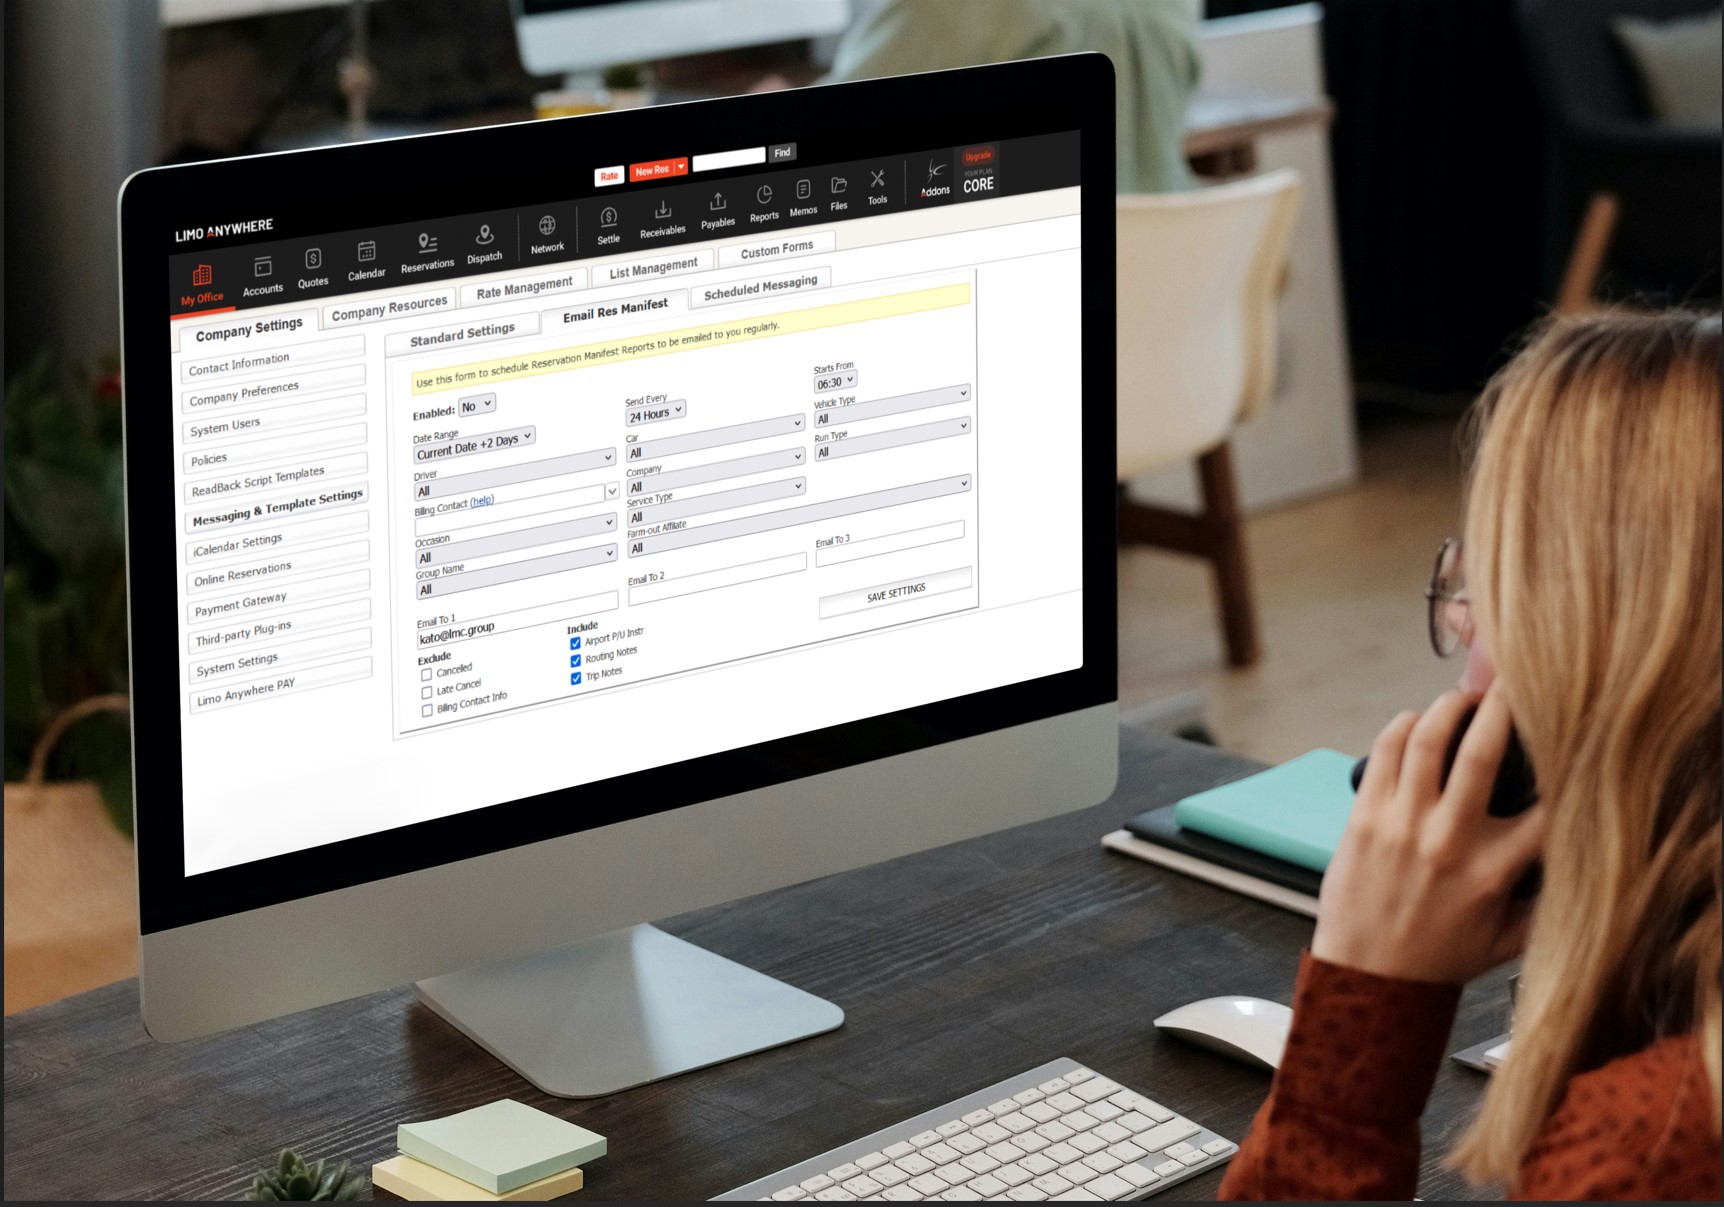
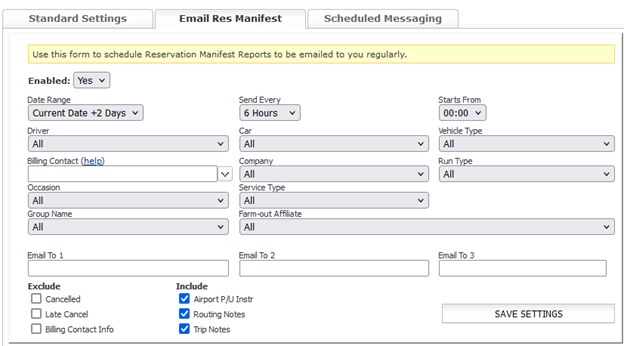
2. Click on Messaging & Template Settings in the lefthand menu. Navigate to the Email Res Manifest tab.

3. Set the Enabled dropdown to ‘Yes’ to activate the feature.
4. Choose the Date Range (Current Date, Current Date +1 day, or Current Date +2 days).
5. Set the Frequency: You can select how often you’d like the manifest to be sent (timeframes available include every 2, 4, 6, 8, 12, or 24 hours).
6. Filter the manifest by specific Drivers, Cars, Vehicle Types, etc. (Note: We recommend leaving filters blank to ensure you receive all trips on the manifest.)
7. Enter up to three email addresses where the manifest will be sent.
8. Click the checkboxes as appropriate for whether to exclude certain items like ‘Cancelled’ or ‘Late Cancel’ trips or include additional notes like ‘Airport Pickup Instructions’ or ‘Routing Notes’.
9. Click the Save Settings button to apply any changes.
Having an email reservation manifest delivered regularly gives you peace of mind knowing you and your team has up-to-date information at your fingertips, even if you’re not logged into the system. If you have questions or need assistance, Limo Anywhere’s Support Team is always ready to help. Contact us at 888-888-0302 Ext. 2 or email Support@LimoAnywhere.com.


